使用したPC
プロセッサ	Intel(R) Core(TM) i7-12700H
実装 RAM	32.0 GB
GPU		RTX 3080 Laptop (VRAM 16GB)
はじめに
日本語の追加学習が加えられたDeepSeek-R1関連のモデルで現状一番良いと思うのがサイバーエージェントが公開してくれている「DeepSeek-R1-Distill-Qwen-14B-Japanese」です。あくまで私個人の調査ですが・・・。今回はそちらを使います。上記PCで140億パラメーターのモデルを動かすのは無理なので4bit量子化を用いました。vLLMがLinuxでしか使用できないのでサーバーサイドはWSL2を使用しています。クライアント側は同じPCのWindowsです。もちろん他のPCからサーバーにアクセスすることも可能です。サーバー側
環境
Ubuntu 24.04 on WSL2
Python 3.12
CUDA 12.4
vLLMのインストール
venvでPython仮想環境を作成した後に以下のようにしました。git clone https://github.com/vllm-project/vllm.git cd vllm git checkout v0.7.0 VLLM_USE_PRECOMPILED=1 pip install --editable . pip install autoawq
量子化のためにautoawqを使いますがvllmとのバージョンによってはtransformersライブラリのバージョンで衝突が起きます。
そのためvLLM v0.7.0を指定しています。
vllm 0.7.3.dev178+g69e1d23e.precompiled has requirement transformers>=4.48.2, but you have transformers 4.47.1.
モデルのダウンロードと量子化
以下のPythonスクリプト(run_awq.py)を用意して実行しました。モデル自動的にダウンロードされます。from awq import AutoAWQForCausalLM from transformers import AutoTokenizer from typer import Typer, Option import os app = Typer() @app.command() def main( model_path: str=Option(..., "--model", "-M", help="original model"), ): quant_path = os.path.basename(model_path) + "-awq" quant_config = { "zero_point": True, "q_group_size": 128, "w_bit": 4, "version": "GEMM" } # Load model model = AutoAWQForCausalLM.from_pretrained( model_path, **{"low_cpu_mem_usage": True, "use_cache": False} ) tokenizer = AutoTokenizer.from_pretrained(model_path, trust_remote_code=True) # Quantize model.quantize(tokenizer, quant_config=quant_config) # Save quantized model model.save_quantized(quant_path) tokenizer.save_pretrained(quant_path) print(f'Model is quantized and saved at "{quant_path}"') if __name__=="__main__": app()
python run_awq.py -M cyberagent/DeepSeek-R1-Distill-Qwen-14B-Japanese
「DeepSeek-R1-Distill-Qwen-14B-Japanese-awq」という量子化されたモデルが保存されます。
実行
vllm serve DeepSeek-R1-Distill-Qwen-14B-Japanese-awq --max-model-len 8192
補足1
「--max-model-len」に指定する数字が大きすぎるとエラーが出ます。PC環境(おそらくVRAM用量)によって指定できる数字は変わってくると思います。
ValueError: The model's max seq len (16384) is larger than the maximum number of tokens that can be stored in KV cache (14320). Try increasing `gpu_memory_utilization` or decreasing `max_model_len` when initializing the engine.
補足2
「--quantization awq」は指定しないでOKです。こちらに以下のような記述があります。
Method used to quantize the weights. If None, we first check the quantization_config attribute in the model config file. If that is None, we assume the model weights are not quantized and use dtype to determine the data type of the weights.
「config.json」内をのぞいてみると以下の記述があります。
  "quantization_config": {
    "bits": 4,
    "group_size": 128,
    "modules_to_not_convert": null,
    "quant_method": "awq",
    "version": "gemm",
    "zero_point": true
  },
クライアント側
環境
Windows 11
Python 3.12
Python環境構築
「openai」と「gradio」をインストールしただけです。gradio==5.16.0 openai==1.63.0
Pythonスクリプト
以下を実行するだけです。IP Addressは「localhost」でWindows側からWSL2へアクセスできます。
from openai import OpenAI
import gradio as gr

openai_api_key = "EMPTY"
openai_api_base = "http://localhost:8000/v1"

client = OpenAI(
    api_key=openai_api_key,
    base_url=openai_api_base,
)

def make_message(
    message: str,
    history: list[dict]
):
    history.append({"role": "user","content": message})
    return "", history

def bot(
    history: list[dict]
):
    stream = client.chat.completions.create(
        model="DeepSeek-R1-Distill-Qwen-14B-Japanese-awq",
        messages=history,
        temperature=0.5,
        max_tokens=4000,
        #frequency_penalty=1.1,
        stream=True
    )
    history.append({"role": "assistant","content": ""})
    for chunk in stream:
        history[-1]["content"] += chunk.choices[0].delta.content
        yield history

with gr.Blocks() as demo:
    chatbot = gr.Chatbot(type="messages", allow_tags=["think"])
    msg = gr.Textbox()
    clear = gr.ClearButton([msg, chatbot], value="新しいチャットを開始")

    msg.submit(make_message, [msg, chatbot], [msg, chatbot], queue=False).then(
        bot, chatbot, chatbot
    )

demo.launch()
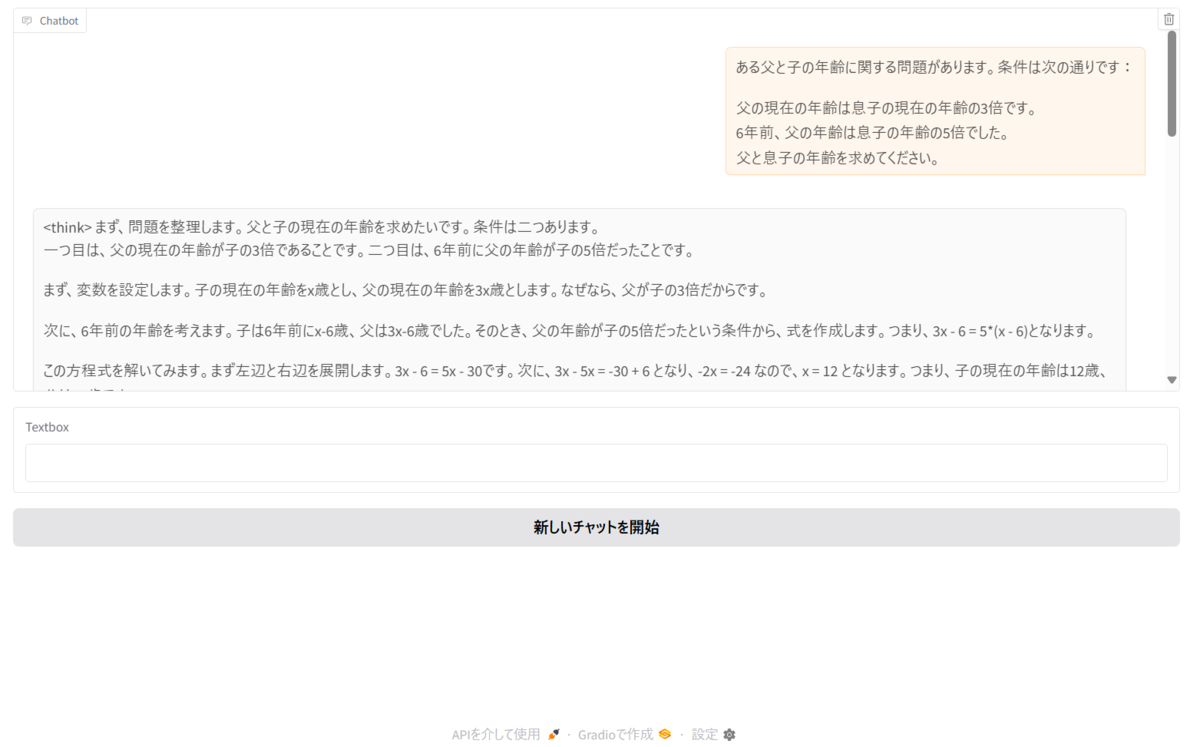
実行画面