こんにちは。いつものtaanatsuです。
今日はSpring bootにSudachiを入れてさっぱりさせていきたいと思います。
それではやっていきましょうか。
Spring bootの準備
Spring bootのプロジェクトはSpring Initializrを使うと楽に作れます。
ひとまず必要最小限で作っていきましょう。
※Javaのバージョンはお使いの環境に合わせて選択してください!

GENERATEボタンを押下するとZIPファイルがダウンロードされるので
展開してIDEで開きます。
今回はIntelliJ IDEAで作業していきます。
IntelliJ IDEAだとGradleのくるくるボタンを押下すると、自動で必要なライブラリを集めてきてくれます。
便利ですね!

とりあえずControllerを作ってみる
/src/main/java/com/example/demo/配下に、controllerディレクトリを作り、SudachiController.javaを入れます。
▼▼▼▼

SudachiController.javaの中身は以下のようにします。
package com.example.demo.controller;

import lombok.RequiredArgsConstructor;
import org.springframework.web.bind.annotation.GetMapping;
import org.springframework.web.bind.annotation.RequestMapping;
import org.springframework.web.bind.annotation.RestController;

@RestController
@RequiredArgsConstructor
@RequestMapping("/")
public class SudachiController {
    @GetMapping("/")
    public String index() {
        return "hello";
    }
}
ここまでできたら右上の三角マークを押します。

するとコンパイルされるので、待ちます。
コンパイルが終わると http://localhost:8080 にアクセスするとページが表示されると思います。
Sudachiを導入する
今回のSpring bootはライブラリ管理ツールに「Gradle」を使っているので、
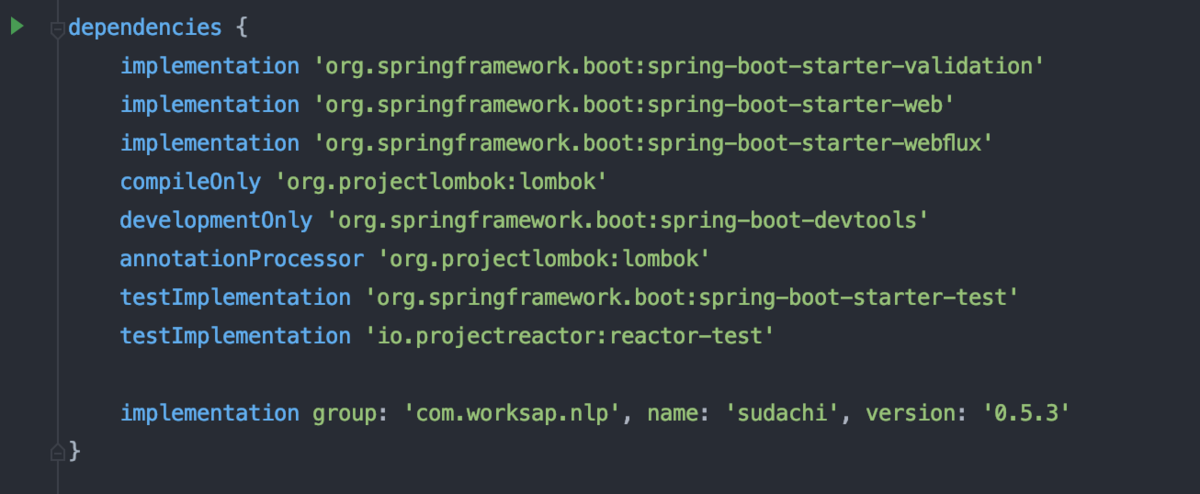
以下の行をdependenciesの中に追加します。
implementation group: 'com.worksap.nlp', name: 'sudachi', version: '0.5.3'
その後、Gradleのくるくるボタンを押します。
コレで準備完了です。
Sudachiの必要なもの(辞書など)を用意する
Sudachiを使うには、設定ファイルが必要です。
必要なのは「sudachi.json」と「char.def」です。
これらはSudachiのGitHubリポジトリから取得できます。
上記2つのファイルを
/src/main/resources/配下にsudachiディレクトを作成し、その中に入れます。
次に、形態素解析に必要な辞書「system_core.dic」を準備します。
この中の、どれでもいいですがひとまずsudachi-dictionary-latest-core.zipをダウンロードしてきます。
コレも解凍して、「system_core.dic」名前にして/src/main/resources/sudachi/配下に保存します。

コレで準備完了です。(2回目)
Sudachiで形態素解析をする
SudachiController.javaの中身を以下のように変えていきます。
package com.example.demo.controller;

import com.worksap.nlp.sudachi.Dictionary;
import com.worksap.nlp.sudachi.DictionaryFactory;
import com.worksap.nlp.sudachi.Morpheme;
import com.worksap.nlp.sudachi.Tokenizer;
import lombok.RequiredArgsConstructor;
import org.springframework.core.io.ClassPathResource;
import org.springframework.web.bind.annotation.GetMapping;
import org.springframework.web.bind.annotation.RequestMapping;
import org.springframework.web.bind.annotation.RestController;

import java.io.IOException;
import java.nio.file.Files;
import java.nio.file.Path;
import java.util.List;

@RestController
@RequiredArgsConstructor
@RequestMapping("/")
public class SudachiController {
    @GetMapping("/")
    public String index() throws IOException {
        // 形態素解析したい文章
        final String text = "こんにちは、世界";

        // 設定ファイルの読み込み
        final Path sudachiSettingJsonPath = new ClassPathResource("sudachi/sudachi.json").getFile().toPath();
        final String sudachiSettingJson = Files.readString(sudachiSettingJsonPath);

        // 辞書ファイルの読み込み
        final String sudachiDictionaryDirectory = new ClassPathResource("sudachi/").getFile().toPath().toAbsolutePath().toString();
        final Dictionary sudachiDictionary = new DictionaryFactory().create(sudachiDictionaryDirectory, sudachiSettingJson);

        // 形態素解析を行うインスタンスの作成
        Tokenizer tokenizer = sudachiDictionary.create();

        // 形態素解析の実行
        final List<Morpheme> tokenList = tokenizer.tokenize(Tokenizer.SplitMode.C, text);

        // 形態素解析の結果をとりあえず変形
        final String result = tokenList.stream()
                .map(morpheme -> morpheme.surface() + "は" + "「" + morpheme.readingForm() + "」と読み、品詞は「" + morpheme.partOfSpeech().get(0) + "」で、標準形は「" + morpheme.normalizedForm() + "」です。<br>")
                .collect(Collectors.joining());

        return result;
    }
}
そしてビルドボタンを押下し、コンパイル終了後に
http://localhost:8080 にアクセスしてみましょう!

形態素解析、されましたね!!
終わりに
自然言語処理系はPythonがやはり強いですが、
Javaでやると型がしっかりしていてその分保守性が上がりそうですね!
みなさんもぜひ、Javaでも自然言語処理をしてみてください。
……あ、今回はサンプルなのでControllerに全部処理を書いていますが、ServiceやRepositoryを使って分けて処理を書くほうがいいですね!
プロジェクトで使う際はご注意を!
それでは、また次回!
