Twitter等の外部アカウントの認証を開発環境で試すのは秘匿情報を本番と開発環境で分けたり等、色々考慮することが多くて面倒だと思うのですが、OmniAuthのDeveloper Strategyを使うと簡単にOmniAuthを使った認証処理を試せそうなので使い方とかをMEMOしておきます📝
試しているOmniAuthのバージョンはomniauth (1.9.1)、Railsはrails (6.1.0)です。
- Developer Strategyとは?
- Developer Strategyを使う準備
- Developer Strategyのログインフォーム
- Developer Strategyのログイン処理サンプル
- 参考
Developer Strategyとは?
OmniAuthのREADMEにも記載されている通り、OmniAuthに内蔵された開発用のStrategyです。Developer Strategyを使っておいて、のちのち他のTwitter等のStrategyに切り替えるといったことが簡単に出来るようなもののようです。
One strategy, called Developer, is included with OmniAuth and provides a completely insecure, non-production-usable strategy that directly prompts a user for authentication information and then passes it straight through. You can use it as a placeholder when you start development and easily swap in other strategies later. https://github.com/omniauth/omniauth#an-introduction
Developer Strategyを使う準備
Developer Strategyを使うには他と同様にinitializerで以下を実行します。fields、uid_fieldの値は任意の値に変更してください。
Rails.application.config.middleware.use OmniAuth::Builder do
  if !Rails.env.production?
    provider :developer, fields: [:email, :nickname, :user_id], uid_field: :user_id
  else
    # 本番で利用するtwitter等のその他認証プロバイダ用の設定を記述
  end
end
そしてCallbackを受け取れるようにroutesにpost '/auth/:provider/callback', to: 'sessions#create'を追記しときます。
Rails.application.routes.draw do
  get '/', to: 'posts#index'
  post '/auth/:provider/callback', to: 'sessions#create'
end
Developer Strategyのログインフォーム
http://localhost:3000/auth/developerにアクセスすると以下のフォームが表示されます。
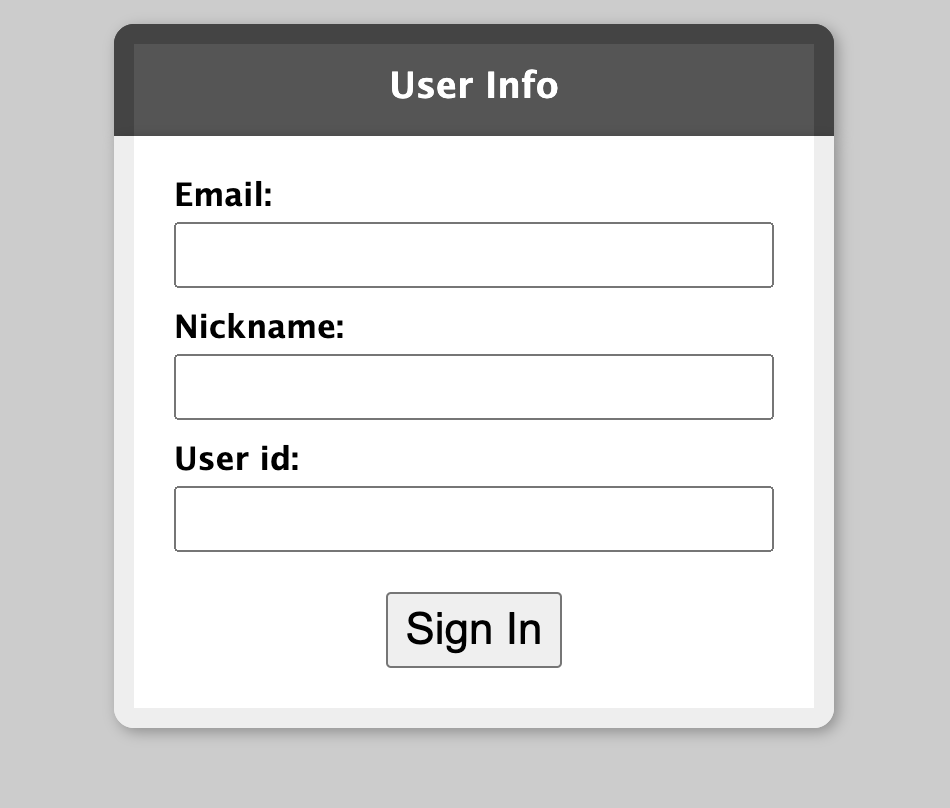
<form method="post" action="/auth/developer/callback" novalidate="noValidate">
  <label for="email">Email:</label>
  <input type="text" id="email" name="email">
  <label for="nickname">Nickname:</label>
  <input type="text" id="nickname" name="nickname">
  <label for="user_id">User id:</label>
  <input type="text" id="user_id" name="user_id">
  <button type="submit">Sign In</button>
</form>
このフォームはinitializerで定義したfieldsを元に動的にOmniAuthがフォームのVIEWを生成してくれます😳
実際に入力してSign Inを押すと入力値をパラメータにPOST "/auth/developer/callback"のリクエストが発生します。
Started POST "/auth/developer/callback" for 172.18.0.1 at 2021-01-02 16:46:31 +0900
I, [2021-01-02T16:46:31.340986 #1]  INFO -- omniauth: (developer) Callback phase initiated.
Processing by SessionsController#create as HTML
  Parameters: {"email"=>"test@example.com", "nickname"=>"test", "user_id"=>"111", "provider"=>"developer"}
Developer Strategyのログイン処理サンプル
あらかじめroutesでコールバックを受け取るpost '/auth/:provider/callback', to: 'sessions#create'を定義しているので、SessionsController#createに認証情報を取得してユーザーを作成 or 取得、セッションに格納するようなログイン処理を入れてあげればOmniAuthを使った認証を開発環境で簡単に試すことが出来ます✨
class ApplicationController < ActionController::Base
  def current_user
    @current_user ||= User.find_by(id: session[:user_id])
  end
end

class SessionsController < ApplicationController
  skip_before_action :verify_authenticity_token, only: :create

  def create
    auth_hash = request.env['omniauth.auth'] # 入力された認証情報を取得できる
    # 取得情報を元にユーザーを取得 or 作成するようなメソッドを定義しといてUserIdをsessionに保存
    session[:user_id] = User.find_or_create_from_auth(auth_hash).id
    redirect_to '/'
  end
end
request.env['omniauth.auth']には以下のような形で入力値が入ってます🙌
# request.env['omniauth.auth']の値
{"provider"=>"developer",
 "uid"=>"111",
 "info"=>{"email"=>"test@example.com", "nickname"=>"test", "user_id"=>"111"},
 "credentials"=>{},
 "extra"=>{}}
OmniAuthのDeveloper Strategy、あまり使ったことなかったのですが非常に便利ですね✨
